Sunday, August 12, 2012

Few Watches

Update 9/14/2012-------------

Before reading this article, check out my impression on finally receiving the watch after several production delays and hardly any communication. I can't in good conscience recommend their custom dials as they are a disappointment, and their steel bracelets are a waste of money as they do not fit the lugs.

I came across a rather nontraditional European watch company in a sense that they are located in Sweden and assemble watches there but they use Miyota movements which are manufactured by Citizen who is a Japanese watch maker. What sets Few apart is that they offer a selection of cases between two Citizen Miyota movements; the 8205 which is an automatic movement capable of a 40hr power reserve and the OS20 which is a quartz chronograph. I personally do not care for quartz watches and it is the automatic movement that caught my attention. The 8205 is a 21 Jewel movement that beats at the modern 21.6k BPH with a centered hour, minute, and second hand with a day/date window. The crown can be used to wind in it's neutral position and pulls out two clicks where the first click position is used to set day or date depending on the direction it is turned and the last and outer click will set the time.

8205 technical drawing

8205 exploded view from the front

8205 exploded view from the back

At first glance Few makes good looking watches with a lot of choices at a competitive price and as you poke around the website, you realize that there are various levels of customization offered with many of those options at no additional cost which is just simply awesome. I'm not talking just a simple change of the wristband here but as granular as picking the hands, color of the second hand, crown shape, case lid, even a custom dial. Naturally I had to take the watch customization for a spin and lost myself for hours configuring variation upon variation which lead me to designing a custom dial as I was close to the feel of what I wanted with the stock dials but wasn't quite there yet. What started out as a simple curiosity has now turned into an order and I haven't been this giddy for a watch of my own since building one back in January.

The watch customization is stepped so that anyone can make a watch and I highly recommend creating an account before starting (it's free) for two reasons, 1). You will have access to dial customization, and 2). You can save your dials and watch configurations. Once I narrowed down the case to the Black PVC coated case with the dive style bezel, I picked the Rolex Submariner style hands with a red second hand, the crown is a modern tall crown and next came the dial. This is where the website kind of sucks, the website's dial design tool is barely adequate and is really clunky to say the least. I found myself creating the dial in Photoshop and Illustrator and uploading GIF images (to keep the transparency) to the website and building the dial that way. I spent countless hours designing dials for my SWC watches and this is no different; I tend to design dials that appeals to my aesthetic taste while keeping general wearability in mind where I want to design a timeless timepiece and where each dial speaks to me differently. This time around however, I was designing something specifically for myself and I wanted to create a dial that makes the statement of, yes that's me; that there is no mistake that the watch belongs to me. After about four hours or so of trying various iterations I have arrived on a design that is most certainly me.

The close up detail, I went with a grey dial color with white numerals and the cross wrench and M4, yup that's me for sure. I kept the Few logo as I wanted to maintain their brand as advertisement for them.

Filled with the grey for better visual representation

Mock up with all the parts I picked out, this is what the final production watch should look like. The chapter ring I believe will be installed as in either a chrome or lume insert.

Assuming that Few can execute my design well, it just may become my everyday beater at $224 shipped.

UPDATE: I forgot to include this on the original post and this is purely an observation when I bought my watch. I recommend using Paypal as the CC method does not change to a secure protocol, meaning it remains on HTTP and that would be unencrypted CC info being transmitted.

I look forward to my watch's arrival, I just received an email this morning stating my watch is, "In Production" with the email showing a simple diagram of it's order process which goes like this: In pre-production > In production > Preparing shipment > Shipped. As soon as I receive my watch and have some time wearing it, I will write a full review hopefully in the very near future.

Thursday, August 9, 2012

Trying out FrogLube

It seems that I am late to the FrogLube party as I am not one to get sucked into the hype and jump on the band wagon. What made me decide to try it was when I recently had some 20th century rust from my Colt 1901 spread to my 21st century 1911 (built circa 2010) and it was the sudden spread of rust on the 1911 that made me want to try the FrogLube paste in hopes of better preserving the pistols in storage.

There are mountains of articles and videos on how to apply the stuff that extol the benefits and virtues of FrogLube and what piqued my interest was when I was reading up on how the paste is dynamic in a sense that it exists in various states depending up on the climate. I typically oil and coat my guns with G96 which I love and really haven't found a better performing lubricant. G96 is stable across various temperatures and climates that we experience in the Northeast and what I wanted in addition is something that did not evaporate off of the gun as quickly. FrogLube's instructions state that the gun should be heated up before applying and the idea is to allow the lubricant to penetrate the metal deeply for a lasting protection against things like corrosion and this is the part that made me finally order the stuff.

I bought it off of Amazon (if you haven't gotten a prime membership yet, invest; it's worth it) and arrived in one day. I tear into the package to find application instructions, the paste and the liquid, cloth and applicator brush. Up on opening the paste jar I take a wiff of it to smell the mint smell that everyone speaks of it and here is what it smells like: Pepto-bismol.


I heat my 1911 frame and slide up with my heat gun until it's a bit more than warmer to touch and brushed on the FrogLube. It brushed on easier than I expected being a paste and as it hit the warmed metal, it appeared to melt right away and I continue to apply heat via the heat gun to let the stuff penetrate the metal.

My 1911 field stripped prior to heating and application

Ye olde trusty heat gun

The entire process took maybe twenty minutes to coat the frame, slide, barrel, as well as small parts from the field strip. When I put it back together, the slide felt a little rough to rack so I added some of the liquid FrogLube to the slide rails with a toothpick and it was slick as goose shit in no time. I placed the now coated 1911 back near my 1901 to see if the rust will spread again and if it does, if it is at a reduced rate, area, etc.

My 1911 reassembled

Perhaps I should try coating my AR BCG with FrogLube...

Sunday, July 29, 2012

The various AR-15 stocks I have tried and my thoughts on them.

In Massachusetts, we have a state level Assault Weapon Ban (AWB) that we inherited from the federal AWB which was passed in 1994 and expired March 2, 2004 after various government and private research agencies finding no evidence indicating that the AWB made any positive impact towards the reduction of gun violence and gun related crime. The MA AWB is the same as the federal one and it governs specific parts of the "Assault Weapon" configuration and for us in the Commonwealth who wish to have a pistol grip on our AR-15 that means we can not have a telescoping stock and if one does, it must be pinned; and we still have the law in place.

The MA AWB has created a niche market for those of us that can not have something as simple as a telescoping stock on our rifles to be able to adjust length of pull which is the measurement between the center of the butt of the stock to the center of the trigger. The length of pull varies depending on the body type and arm reach and residents of the Commonwealth must find odd sized fixed stocks and take financial risks in hopes of it fitting our bodies well. The other option that I mentioned in the beginning of this post is to pin a telescoping stock to immobilize it and as long as the pinning is done so that it can not be removed easily, it becomes a fixed stock in the eyes of Massachusetts legislation.

I am not a tall dude nor do I have lanky long arms so a traditional A2 size stock is far too long for me and when I built my first AR-15 I went on a hunt to find out who made what length stock. My search quickly showed that not only were there a limited amount of information available as to length of stock and length of pull but for what they are, the stocks are simply over priced considering material and manufacturing and felt fleeced just for living under the MA AWB. The first short fixed stock I tried was the Sully, also know as the Stubby stock which as the latter name implies is a shorter version of the commonly seen AR-15 A2 stock. I bought mine from Bushmaster for $69.50 plus shipping as I had no one around that had one that I could try and no store locally stocked it to check it out in person and had to find out the hard way that the stock was too short. I tried various stocks through friends and other courteous shooters at my range and they were not the right length or feel until I tried a telescoping stock on a pre-ban rifle. Faced with the fact that after spending a f$*k ton of money on other stocks that I can't return AND I have to buy a telescoping stock AND pin it to make a stationary POS I can't adjust and defeat the otherwise convenient design, least to say I'm annoyed as all hell.


Seeing that I was going to be drilling a hole through it, I decided to find the cheapest option possible and bought a UTG stock kit on Amazon for around $50 shipped which included the carbine length buffer and tube as well. As for pinning the stock, it isn't a hard process and I encourage everyone to do it themselves as paying for this process is ludicrous. If you feel intimidated by the project and live in MA, contact me and I will help you out. The process is simple, put the stock on the lower receiver per the supplied instructions or the dozens of online tutorials that you can find on the web and than move the stock until you find the length of pull that is right for you. If you want an empirical method to measure your personal length of pull, measure the distance between the second joint of your trigger finger to the anterior center of your elbow which typically comes out to around 14.5" for the average person and is why the average length of pull on a rifle is 14". Once you decide what length is right for you, you want to clamp your stock so that it will not move, this will typically require a vise block for an AR-15 lower receiver which I bought mine on Amazon from the seller Squirrel Daddy for $33.95 shipped. Once you have it securely clamped, drill through the bottom of the stock where it is a square shape using a 1/8" drill bit, drill through the stock and buffer tube. Once the hole is made, I use a 1/8" x 5/8" roll pin which is what is used to secure the AR-15 trigger guard to pin the stock in place and now the telescoping stock is post-ban complaint. I typically drill all the way through the other side in case if I need to remove the pin to re-adjust it, I can use a 1/8" roll pin punch and hammer it out.

Below shows the bottom where it is sqaure and the red X is where I typically drill through.

The vise block kit, left is for the lower which inserts into the mag well and the right is for the upper where the pivot and take down lugs are pinned in.

I haven't had to contemplated a new stock in some time since my first AR is a post-ban lower and had no desire to spend a ton of money on a new stock just to pin it in place where else my SBR is being built on a pre-ban lower which is to say that it was manufactured before September 1994 and this opened up the possibility for a telescoping stock while remaining lawfully compliant without having to pin the stock. I decided on a Vltor A5 buffer tube to aid in dwell time as well as having a high quality component and the Vltor IMOD stock for it's size and weight and so far it has been my favorite stock that I have tried to date. The IMOD stock measures 6.25" long and an additional .376" for the butt pad which is an ideal density rubber with a traction pattern that glues the stock to your shoulder while the light weight stock is an unencumbered design and adds to the comfort of the stock.

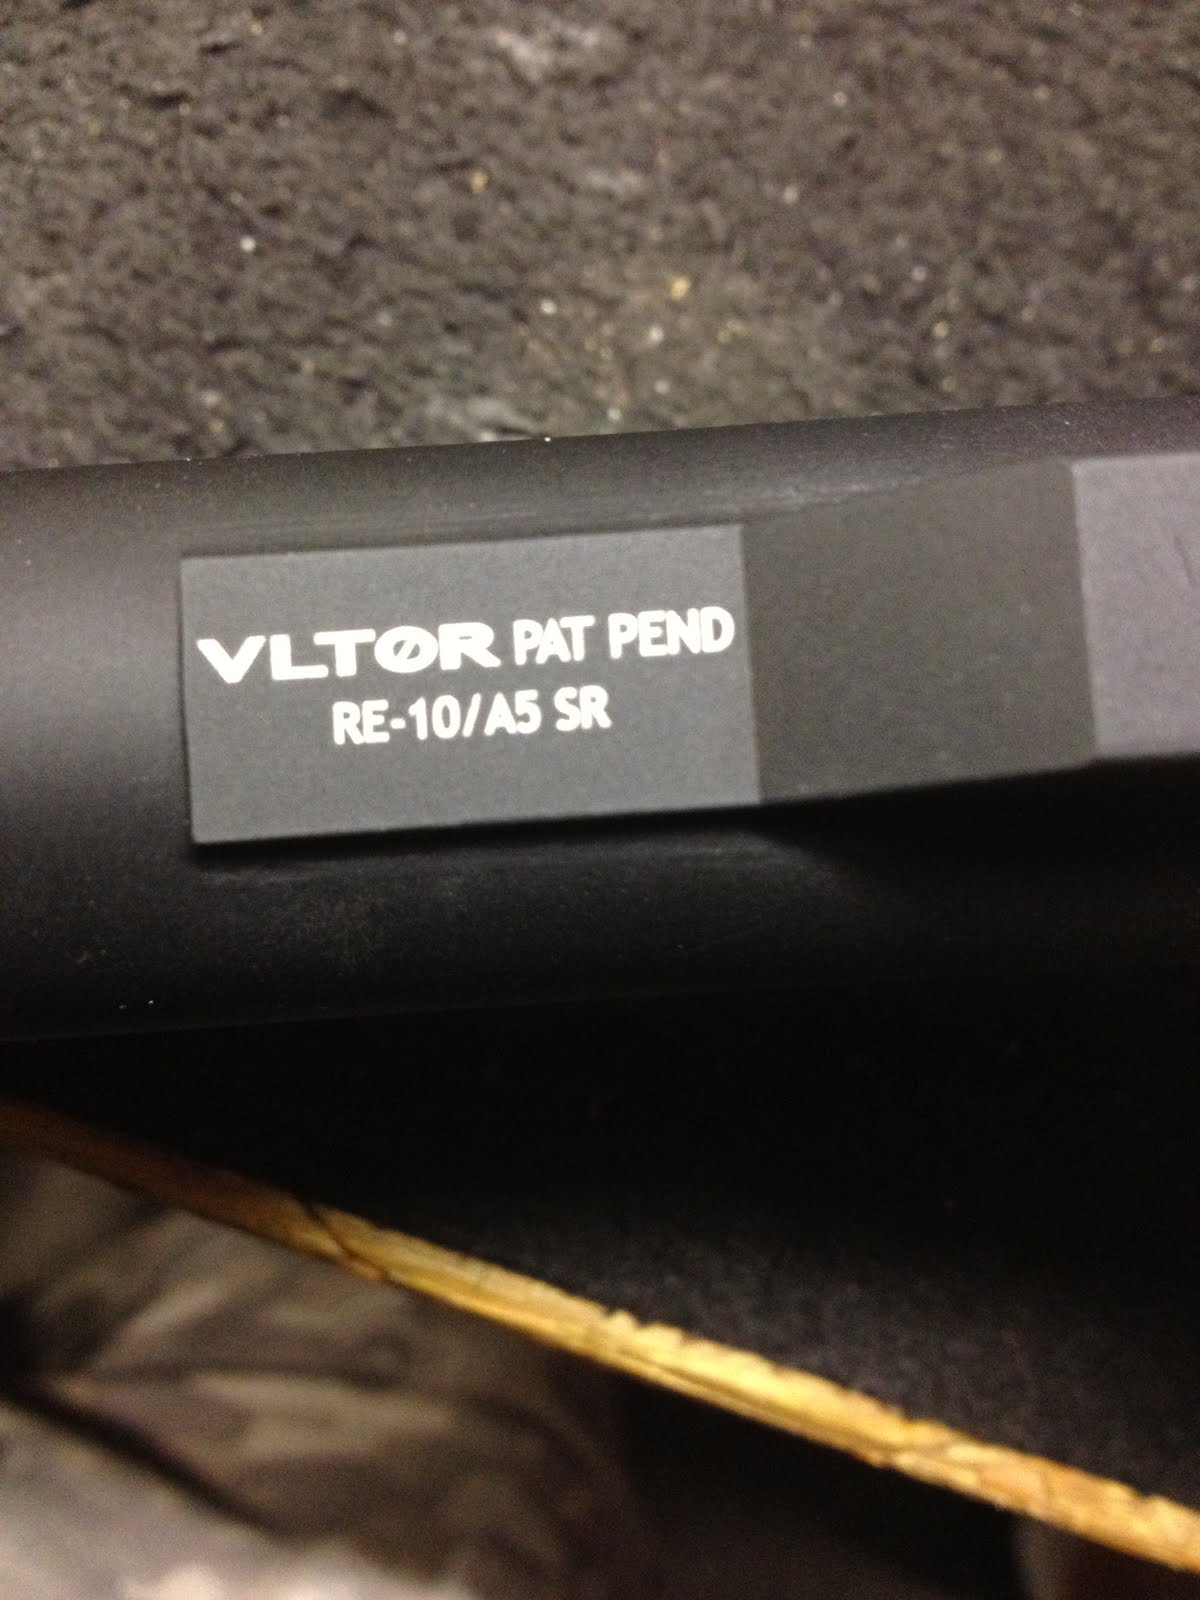
The A5 tube, my one gripe is the finishing near the logo, I am going to have to file the corners down as they are not rounded.

Jeez sharp edges

The comfortable and nice gripping stock pad

The top of the stock has a witness hole that will show the stock position if you are using a tube with markings.

The IMOD stock has an integral quick detachment (QD) point in the rear of the stock as well as traditional sling loops. There are two tubes which comprise the cheek weld surface that stores battery sized objects, typically AA or CR123 batteries for illuminated optics. The battery tubes has a rubber gasket sealing it which I think would make it relatively water tight but have not put this to the test yet. The caps to the battery tube has a slit in the stock to lock them in and to remove the caps, the simple yet brilliant design has an integrated graduated surface that pushes the caps out as you turn them making for an effortless removal. The only gripe I have for the stock is that the stock adjustment lever is awkward to manipulate where if I am not gripping the stock to leverage off of it, I can not lift the lever high enough to extract the captive pin and move the stock to a different position.

The kind of awkward adjustment lever and behind it is the reinforced QD coupling

The battery tube with the lid on, next pic with it off and can see where the slit in the stock is as well as graduated ramp.

The gasketed cap and another view of the stock
\

Adjustment lever demonstration

I have tried various Magpul stocks and do like them for the most part as they are comfortable, light weight, and seemingly durable as any other stock on the market. The PRS stock though pricey does offer the shooter multiple points of adjustment to dial in the perfect cheek weld and length of pull but it's not my favorite for active shooting. If I were to shoot nothing but prone and bench and at long distances, I can see the benefit to the expensive PRS stock but as I shoot 3 gun, I felt that it was not the right fit for me. I tried the UBR but couldn't get a comfortable shooting position out of it and as neat as the design was I felt that I would have paid newfangled price for a newfangled thing. Both the MOE and CTR are awesome stocks and offers the best value from Magpul and if you find your self deciding between the two, go with the CTR for the additional friction lock system. Never got a chance to try the ACS or ACS-L nor do I have the desire to, they just aren't that aesthetically pleasing to me and I know that that is a terrible reason to right something off but aesthetics clearly are an important part of the decision or none of us would care if we drove a fugly car. The newest stock offered by Magpul is the STR which I considered buying before purchasing the IMOD but Magpul seems to have this trend in the last couple years of sucking at delivering products on time or not having them available when they are finally released (The XTM hand stop comes to mind). I have seen companies purposefully short supplies to create a perceived demand to control price (oh hey famed game console maker that is motion controlled whom shall remain nameless to avoid a law suit) and I do hope that that isn't the direction that Magpul is heading in.

There is another stock that I want to bring up and that is the Damage Industry's ECS stock. The stock is a direct derivative of the Crane SOPMOD stock which is typically produced my LMT. Crane, like any organization that has a budget will reach out to various manufacturers for pricing and Damage Industry is one of those companies among many that are contracted for various components to the armed forces. The ECS stock feels like a SOPMOD stock and comes in various colors such as SHTF Brown which reveals a sense of humor in the firearm industry, which is a nice change and the ECS costs a fraction of the SOPMOD stock.

Well, off to put more rounds down range with my new stock on a pre-ban lower while I wait for my SBR parts to come in.

Wednesday, July 25, 2012

Tax stamp for SBR approved by BATFE, now to build out an upper

I received my SBR tax stamp in the mail 7/23/2012 and needless to say I haven't been this excited since discovering free porn on the internet. I mentioned in an earlier post that I planned to use the Stag Arms 11.5" SBR upper for my build as it is manufactured by Continental Machine & Tool Co. (CMT) who contracts out to military and OEM such as Colt as well as their own retail channel which is Stag Arms. I have still been getting a ton of flack just because it is a Stag Arms upper by the label whores so let me take a moment and go into a bit of detail to the upper and some comparisons to existing uppers in the market.

I had in mind some specifications that I wanted to meet that would address specific concerns in regards to the shorter barrel length. The first question to be answered when considering a SBR is naturally the barrel length where I clearly want to go shorter than the legal requirement of 16" for the benefit of being a bit faster moving and shooting around obstacles but without sacrificing the reliability and accuracy as well as muzzle velocity and in the end the effectiveness of the 5.56mm round. I chose 11.5" as anything shorter seems to compromise dwell time which is the amount of time the bolt hesitates in the buffer tube before cycling back to close the bolt as it loads another round. The dwell time is affected at a number of locations starting with when the bullet travels down the barrel. The way an AR-15's direct gas impingement system (DI for short) works is that as the bullet travels down the barrel, it passes the gas block where the path of least resistance will have the gases from the fired round travel up the gas block and into the gas tube which gets fed back into the receiver where the gas impinges on to the bolt carrier's gas key which pushes the bolt back to cycle it (I found an excellent video on YouTube that illustrates what I just explained quite clearly). What changes in a SBR is that the bullet leaves the barrel sooner compared to a 16" barrel which means the path of least resistance for the gas will change to going straight out of the front of the barrel as it is a linear path as well as a larger diameter hole compared to the gas block's port and there will be less gas pushing the bolt carrier back. The lower gas creates a choppier running AR and may create reliability issues as a result starting with dwell time from the choppy cycling of the BCG (Bolt Carrier Group). I was deciding between a 10.5" barrel and a 11.5" barrel where the four percent difference in length gave it an astounding 40% more dwell time with the one inch longer 11.5" barrel and this is where my minimum length came from.

The next issue is muzzle velocity and kinetic energy where after crunching some numbers have come to show that there certainly is less muzzle velocity and kinetic energy delivered out of the end of the barrel between a 16" and SBR barrel lengths but when comparing the increments of SBR barrel lengths from 10.5" out to 14.5" I have discovered that until I got out to 14.5" that there was not a significant enough differences between 10.5" to 12.5" and decided to go with the shortest barrel that I could go without affecting reliability and made my final decision that a 11.5" barrel length is right for me.

Now that I have decided on a 11.5" barrel I wanted to be able to stabilize the bullet well considering the barrel length and I decided on a 1:7 (1 revolution in 7 inches) twist rate which is a fast twist rate capable of stabilizing up to a 77 grain projectile and enough distance within the 11.5" to put a good spin on the projectile from the rifling. I also wanted it to be chrome lined with a heavier profile to extend barrel life as well as to aid in accuracy and manage heat better. The Stag Arms barrel is made of 4150 steel which is harder than 4140 which many of the cheaper barrels are made of and resists wear, warping, and heat better in comparison between the two. 4150 is used for applications such full-auto receivers which would introduce more wear and heat which goes to show the better wear and heat management compared to 4140. I looked around to see who makes a 11.5" barrel with a 1:7 twist rate and discovered that the list is a short one, Bravo Company Mfg, Daniel Defense, and Spike's tactical to name a few and they all make nice barrels and uppers but at a cost. Looking at how a barrel is manufactured, you can only make a barrel so many ways and comparing the Stag barrel to the others I would say it is on par and in some case better than other manufactures and thus; going with Stag Arms upper which also offers me a better price.

Next comes the upper receiver and what is actually important in selecting the receiver: that the military specifications dimensions are met so that the upper receiver will mate with the lower receiver as expected where if out of specification it will affect fit and finish and it should be made with quality materials, the end. Anything beyond the necessary should be per user's use case and should take into consideration what needs the particular use will create and how those needs will be met. As for the ever so slangy buzz word that is 'mil-spec', the specifications are set by the military in regards to the M4 and M16 rifles as a minimum requirement of what the rifle should be comprised of which covers things like what the barrel material should be made of, that the dimensions should be within a given tolerance as to permit across the board parts commonality no matter who the vendor is, the flat top picatinny rails are with in a known dimension, what the buffer tube diameter and thread pitch should be, the buffer weight, and so no to ensure that when a rifle is built, the build is consistent rifle to rifle and that the parts in the armory will be applicable to all of them save for select special purpose rifles which fall under a different set up specifications and under a different weapon designation. There are very cool uppers made such as the Vltor MUR which offers a heavier duty upper, and the Lewis Machine & Tool's monolithic uppers receivers, ADCOR's B.E.A.R uppers with user changeable reciprocating handle, but I wanted to stick to the standard DI AR design for parts commonality and the Stag Arms upper meets all of my requirements without an inflated cost.

Bolt Carrier Group, or BCG is responsible for exactly what the name implies: the bolt; but additionally it creates the lock up against the chamber, loads new rounds and extracts and ejects spent shells, allows the firing pin to travel within to strike the primer for ignition, manipulates the hammer to the ready to fire position, provides a gas key as a surface for the gas to impinge upon, and is a contributing factor to dwell time. The dwell time is affected by the BCG by density and the heavier the bolt, the better it is as far as a SBR is concerned. The additional mass aids in BCG dwell simply by being heavier and creating more mass for the buffer spring to overcome before pushing it back into battery. The weight also helps in minimizing bolt bounce which affects follow up shot times, accuracy, and reliability as well as preventing a possibility for accidental bump fire. The heavier bolts are often called full-auto or M16 bolts and the name comes from the BCG used in full auto M16 and M4 rifles having a heavier mass to accommodate the full-auto BCG cycling of the rifle as well as manipulation of the full-auto sear. The full-auto bolt is not an automatic part and will not turn your semi-auto into a full auto rifle as commonly misunderstood, it just means that it's bigger and heavier as seen below.

Top to bottom: AR-15 'Semi-Auto' BCG, Colt SP-1 BCG, and the M16 BCG. You can see where the tail section (left side) change in size which gives additional mass.

Here is a side view the M16 BCG on top and the AR-15 BCG on the bottom with a clear difference in size at the tail section (right side)

The Stag Arms upper I chose comes included with the M16 BCG and a mil-spec compliant charging handle where other companies such as Bravo Company Mfg. does not include the BCG or charging handle in the upper and must be purchased separately, or in case of other manufactures the included BCG is of the AR-15 variety where I prefer the M16 BCG for the increased mass to aid in the dwell time and overall operation and reliability of the SBR.

My next requirement was to have a low profile gas block but Stag Arm's site shows the SBR uppers only with the Front Sight Block (FSB), oh noes. I called Stag up and asked if it would be possible to get the FSB swapped out with a low profile block at the factory to accommodate after market handguards that would go over the gas block and not only were they very accommodating to the request but that it would also be done free of charge and will be tested before it is shipped....well that's awesome. All of these reasons are why I chose Stag Arms over the competitors and have ordered the upper from Operation Parts and Op Parts owner Charlie is an awesome guy helping me source all of the parts for my SBR and highly recommend buying your next AR needs from him and form my experience, if it is not listed on his site; just email and ask him and he more than likely can get it in for you at am awesome price.

I wondered in an earlier post what stock to buy and I decided on a stock and a buffer tube system, the Vltor A5 buffer tube and IMOD stock. The A5 buffer tube is a mil-spec diameter tube that is longer than a carbine tube but not as long as a full length rifle tube where the extra space is the final piece in aiding in dwell time, the longer length means more space the BCG can compress the spring down and the further it can travel back. Add to this the A5H2 buffer which is heavier than a standard H2 buffer and create a complete solution to SBR dwell time. The other thing that the A5 aids in preventing or out right eliminating is bolt bounce where the bolt bounces back from the chamber lock up before seating into battery or at worse, preventing lock up and not seating into battery at all and at the hazardous end, accidental bump fire/negligent discharge. AlphaOps has a deal on a combo of the IMOD and A5 and not only is it an amazing deal, the customer service is superb and everything shipped quickly. The other stock I considered was the Magpul STR which came out recently to rave reviews but I could not find the color that I wanted in stock but the IMOD was my first choice and it's awesome. The IMOD is comfortable to shoulder and the clubfoot version is comfortable to shoot prone, is lighter that it's predecessors with the same reliable construction you expect from Vltor with a shorter length compared to the EMOD.

As I mentioned earlier that I wanted the low profile gas block to allow a handguard to cover over it and my requirements were to have a continuous rail up top from handguard to upper receiver, with it being thin and light as possible and the handguard I chose was the recently released Troy Industry's Bravo BattleRail. The Bravo BattleRail does away with the complex mounting of it's previous iteration and takes cues from the Alpha rail resulting in a thinner and lighter rail handguard. The 11" version weighs in at 13.35oz. with the width at 2.2" and height of 2.44" and will cover all of the barrel and allows me to mount sights as far out as possible to give it the longest sight radius on the 11.5" barrel length. I also considered the Rainier Arms/Samson Evolution which is a small diameter handguard with options to mount rails as needed but decided that I did not want to buy nor mount the rails separately and adhered to the KISS principle (Keep It Simple Stupid).

Last but certainly not least is the muzzle device. The Stag upper comes with an A2 but that is not what I intend to keep on it, I will be testing out a two muzzle devices from Griffin Armament, the M4-SD Tactical Compensator and the soon to be released flash suppressing compensator. Austin over at Griffin Armament has been kind enough to invite me to test the muzzle devices and I will be publishing my findings here as well as in various forums.

Now to wait for all of my parts to come in...

Monday, July 23, 2012

New Running Shoes

Since beginning running a few weeks ago I have been increasing my run interval thanks to the CT5K (Couch to 5k) app and have learned a ton in that time. One of the things that caught up to me quickly was the show choice since when I bought them I did not make the time to research what shoe to wear and for that matter I did not consider that a proper shoe must exist for a given runner and that assumption has brought me some pain in various areas which I have had to overcome. My initial show choice was the New Balance 580v2 which as it turned out that for a person with normal arches in their feet will be forced to overpronate; which is to say that it causes the knees to roll inward from the support type and direction of the shoe and will cause the knee cap to ride slightly 'out of track' which leads to runner's knees.

Before getting to the next show choice, I made another knucklehead assumption and that was how tight to lace my shoes. With the New Balance's, I felt that the knee pain along with oncoming arch pain in my right foot was the result of the shoes being too loose and that it was perhaps from feeling as if my shoes were coming free as I ran and tensing my feet as I ran. I tied up my laces as tight as I could the next run thinking that I can resist the impulse to tighten my feet if my shoes were cranked on and had no worry of them coming loose....... and was I ever so wrong. As it turns out, I should have loosened my shoe and the cause of arch pain outside of the shoe being the improper fit for that given runner (me), I was likely just tying them too tight to begin with.

I was fortunate that the folks over at Olympia Sports where I bought my shoes let me exchange them and the new shoes I chose (after researching first) is the Nike Lunarglide+ 4. The shoes does not make me pronate or supinate and all the reviews I read are true; they are amazingly comfortable. I still have an ache in my right foot but I suspect that it is not the shoe, but my foot healing from a minor injury to the arch after over tightening the laces with the New Balance 580v2. I've had a few runs with the Lunarglide and they certainly do perform to the hype, and if you are looking for a comfortable running shoe, consider trying them.

Thursday, July 19, 2012

What has more muzzle rise on an AR-15, 16" barrel or 11.5" barrel?

I recently got into a debate among other shooters about which barrel length experiences more muzzle rise, a longer barrel or a short barrel? The debate was between a 16" barrel which is my go to rifle and my soon to be built 11.5" barrel. I speculated that a shorter barrel has a lower muzzle velocity and will have less energy to lift the barrel and everyone else agreed among themselves stating that because the 11.5" barrel is shorter and lighter that it would rise more; so which is right? I have searched across the internet when I got home and come to find that there isn't any data surrounding this debate except for other debates on forums and seeing that I do not have my SBR yet, I can't empirically test this either. Even if I did have the SBR available to test against, what tests would verify this for certain?

I decided to approach this problem scientifically, gathering data such as weight of various barrel lengths and the combination of various hand-guards and add that to an averaged weight of the lower, which in this case will be two pounds due to finding data of completed lowers weighing between 1lbs 7oz out to 2+ pounds. As for the weight of the upper, thanks to a post over at 03designgroup.com who collected weight data on various upper configurations, I picked the configurations I have (16") and plan to have (11.5") and used those weights. Now that I have an average weight to work with for sake of comparison, I need to figure out how fast a bullet travels down a barrel between a 16" barrel and a 11.5" barrel. There is fortunately a ton of data regarding muzzle velocities studied by hobbyists, professional hunters/shooters, and bullet manufacturers and that was by far the easiest set of numbers to come across. The data collection reveals these set of numbers to work with;

16" Barrel Upper with 12" Daniel Defense Lite Rail, A2 bird cage

Overall weight (Avg): 5lb 14oz (2.66486 Kg)
Muzzle Velocity (55gr M193 5.56mm NATO): 3132 FPS (954.6336 m/s)

11.5" Barrel with 10" Daniel Defense Lite Rail, A2 bird cage

Overall weight (Avg.): 4lb 14oz (2.21126 Kg)
Muzzle Velocity (55gr M193 5.56mm NATO): 2872 FPS (875.3856000000001 m/s)

Now that we have weight/mass and velocity numbers to work with, we can now figure out the kinetic energy with the formula KE = 1/2MV * V and when we run the above data through we get the kinetic energy (KE) of each barrel configuration as;

16" barrel's KE = 1,214,277.183135022 Joules

11.5" barrel's KE = 847,244.2122672058 Joules

That is a difference of 367,032.9708678162 Joules of kinetic energy produced between the 16" and 11.5" barrel, making a rather significant 69% difference in kinetic energy output between the two barrel lengths which goes to prove my theory of the lower velocities creating less energy to lift the barrel up.

Yay physics and now to go collect on those bets I made, get ready to pay up suckers.

Monday, July 16, 2012

Geissele Automatics Super Semi-Automatic (SSA) trigger and how it's the bee's knees.

I started building out my pre-ban colt SP1 lower recently and I had to decide on which trigger to install. This build slated to be my SBR lower and plan to run some competitions with it, namely 3 gun matches (yes I know; there are 400 meter and further targets in 3 gun matches....that's why I have a 16" upper as well). In an earlier post, I talked about various triggers and I already knew that I was going to be using a Geissele trigger in my build but the question became which one? I was torn between the Super Semi-Automatic (SSA) and the Super Dynamic 3 Gun (SD3G) and decided to contact Geissele Automatics with my use case of the SBR and 3 gun and of all people, Bill Geissele himself responded. After a brief exchange of emails, he recommended the SSA trigger for my build and I ordered the trigger from the good folks over at Tier One Arms who promptly delivered it in four days which today is that fourth day.

Hurray, arrival!

The difference between a stock GI trigger and a Geissele trigger isn't really apparent until you have one in your hand. The SSA's trigger has a unique hook protruding to the top where it engages the hammer where a stock GI trigger lacks the feature and the disconnector has a unique design where the front portion of it goes through an opening in the aforementioned protruding hook of the trigger body. The hammer has been redesigned as well and the hammer is meant to be lighter to be able to strike faster but the spring on it is a full powered spring as to not risk any light hammer strikes which translates to consistent ignition of the primer and powder.

The factory picture of the SSA where you can see the protruding hook and it's engagement to the hammer in the red box

Here you can see the pass through of the disconnector I described earlier in the red box.

A very neat tool that the SSA ships with is the slave pin which is a small pin that is the same diameter as the trigger pin but is only long enough to fit flush within the trigger assembly. This is intended to hold the trigger and disconnector captive to one another during installation without the need to fumble and curse the disconnector as you line it up in the lower receiver to pass the trigger pin through. I have done a similar method where I used a punch to hold the trigger and disconnector captive in the lower and follow the trigger pin through but the slave pin is certainly an easier step than fitting a punch through.

The slave pin holding the trigger assembly in red box.

As for the installation of the SSA; if you've ever installed an AR-15 trigger than you will quickly realize that the SSA trigger install is no different. The manual is quite clear as seen below and about the only moderately annoying step was the hammer install with the full power spring. The hammer spring felt harder to compress and line up to the lower receiver's hammer pin holes compared to a GI hammer spring and it felt as if there was more resistance. I am saying felt since I do not know for certain if it actually does have more resistance compared to a GI hammer spring.

SSA manual

The installation went quickly and in no time I arrive to the step that I have been looking forward to: trying out the trigger. When slowly pulled you will notice the short take up of the initial two pounds than a wall where the second 2.5 lbs. stage that breaks crisply and as described by Bill Geissele himself, "like a carrot" and the trigger resets and breaks at the same location every time which is really nice to train and shoot with. When the trigger is pulled with speed the trigger breaks quickly like a single stage since the initial take up is short and the two pound take up under stress is negligible. The trigger break being predictably crisp it was a breeze to shoot along with the reset being pleasantly shorter than I expected which produced very quick follow up shots. I am pleased with the trigger's performance so far and look forward to trying the trigger out to distance, which is the final use case criteria I presented to Bill which is why he recommended the SSA over the SD3G stating that the SSA should produce better groups in distance compared to the SD3G. If you are deciding on a new or upgrade trigger, get the SSA as it outperforms the RRA Two Stage Match Trigger easily and at the price point, it simply can not be beat.

Bird's eye view of the installed SSA trigger.

The distinctive 'G' on the Geissele trigger bow.

Now to decide on a stock for this build....